
Setting Up Google Analytics and Google Tag Manager
Configure Google Analytics, Google Tag Manager, and Google Ads conversion tracking for a Vally booking website.
This guide will help you set up Google Analytics and Google Tag Manager to ensure accurate tracking of your users activity, and then link Google Ads so results and conversions are shared across both platforms.
Step 1) Google Analytics 4 (GA4):
Google Analytics helps us understand how people use your website and if they complete actions like bookings. We will create an account, get the Measurement ID, and later connect it with Google Ads so data can flow between the two platforms.
New Accounts
- Go to analytics.google.com and sign in.
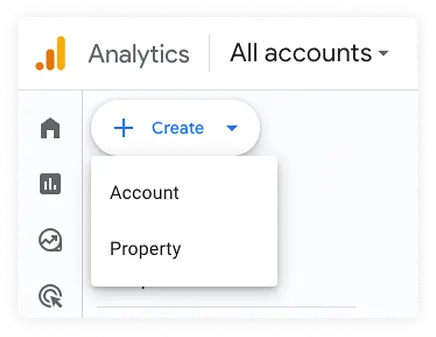
- Click +Create and select Account.
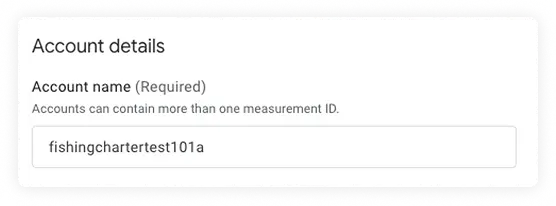
- Enter an Account Name (We recommend using your business name, example: Peacock Adventures).
- Configure data-sharing settings (we recommend unchecking all). Click Next.
- In Property details:
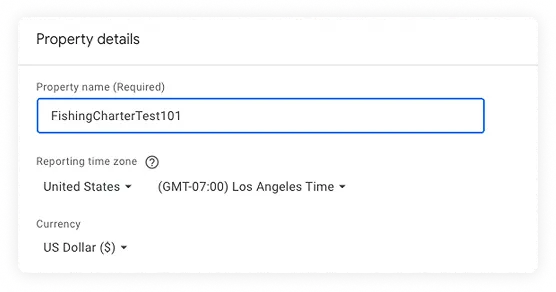
- Enter a Property Name.
- Set Time Zone.
- Select Currency.
- Click Next.
- Set up Business details and objectives:
- For Industry category, select Travel.
- Select Business size.
- Click Next.
- Set up a Data Stream:

- Select Web.
- Enter the site URL and site Name.
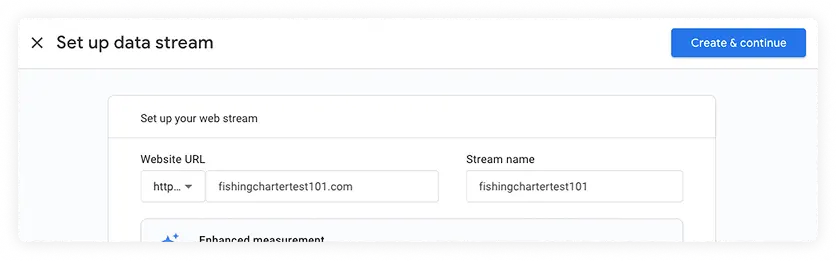
- Click Create & Continue.
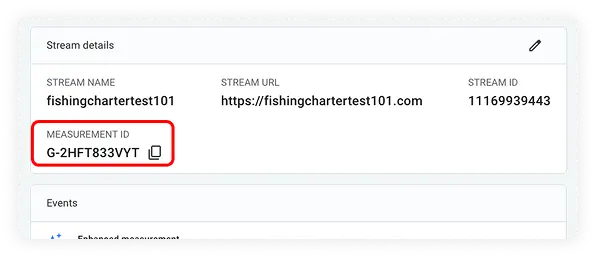
- Property creation will be finished. Click the property to display the Measurement ID (GA4 tag).
- Write down the Measurement ID to use later.
- Write down the Measurement ID to use later.
Existing Accounts:
- Go to analytics.google.com and sign in.
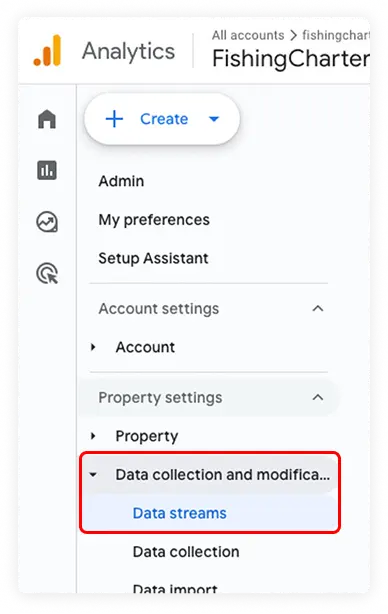
- In the left menu, click Admin.
- Under Data Collection and Modification, click Data Streams.
- Click the property to display the Measurement ID.
- Write down the Measurement ID to use later.

Add Vally and Your Business Domains
Cross-linking domains allows us to avoid counting the same visitor twice and to keep their session active when they move between your site and your Vally booking page, so conversions are tracked correctly.
- Go to Admin.
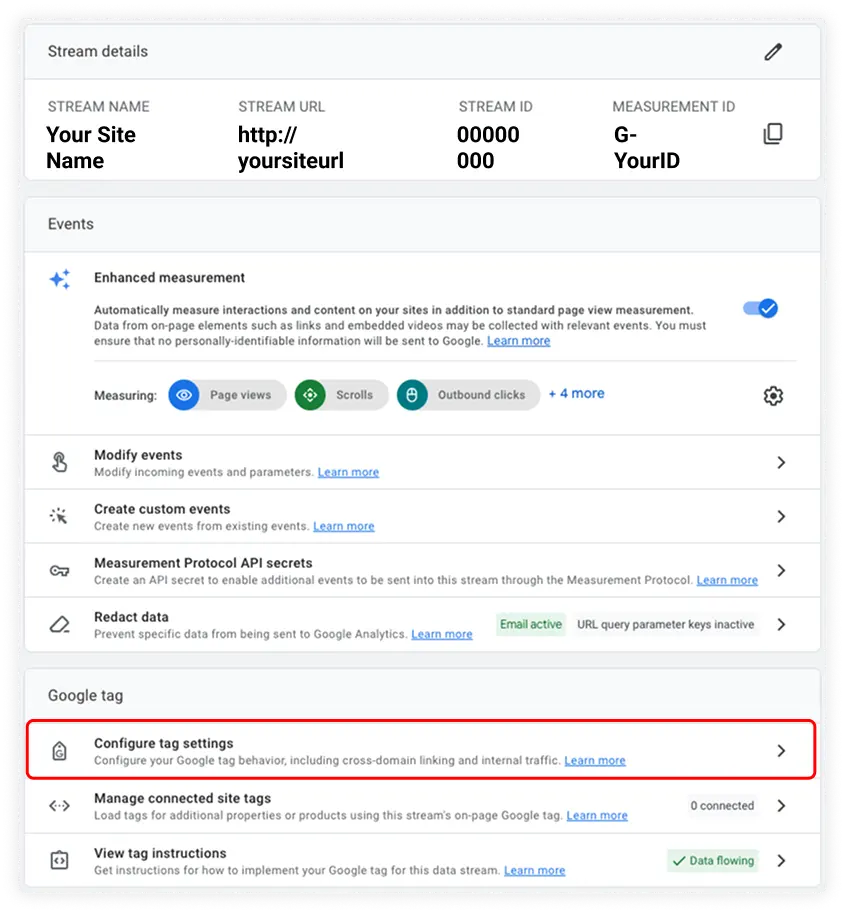
- Under Property, click Data Streams and select your web data stream.
- In the stream settings, click Configure tag settings.
- Click Configure your domains.
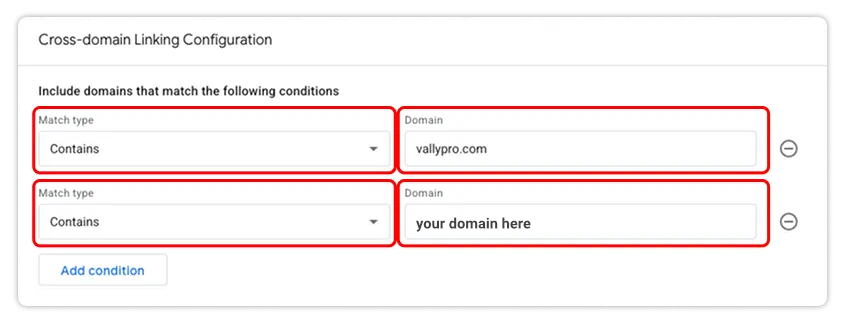
- Under Include domains that match the following conditions:
- For the first condition, set Match type to Contains and enter vallypro.com.
- Click Add condition.
- For the second condition, set Match type to Contains and enter your business website domain.
- Click Save.
Step 2) Google Tag Manager (GTM):
Google Tag Manager is where we manage tracking codes so your website can send information to Google Analytics. Vally provides a ready-to-use file (called “container”) with the important tags already configured.
New accounts:
- Go to tagmanager.google.com and sign in.
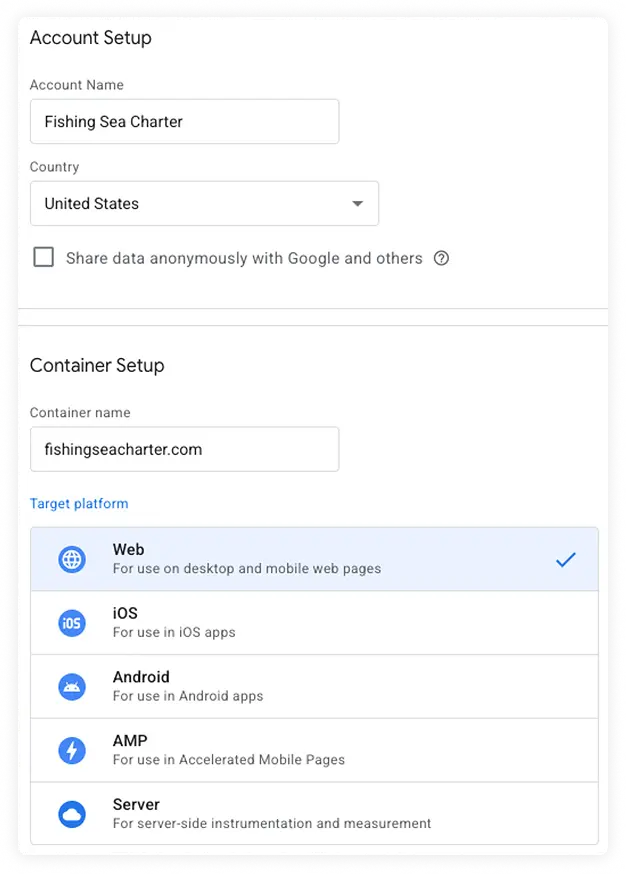
- Click Create Account, then fill in the Account Name and select the Country.
- On Container Setup:
- In Container Name, type the website domain.
- In Target Platform, select Web.
- Click Create.
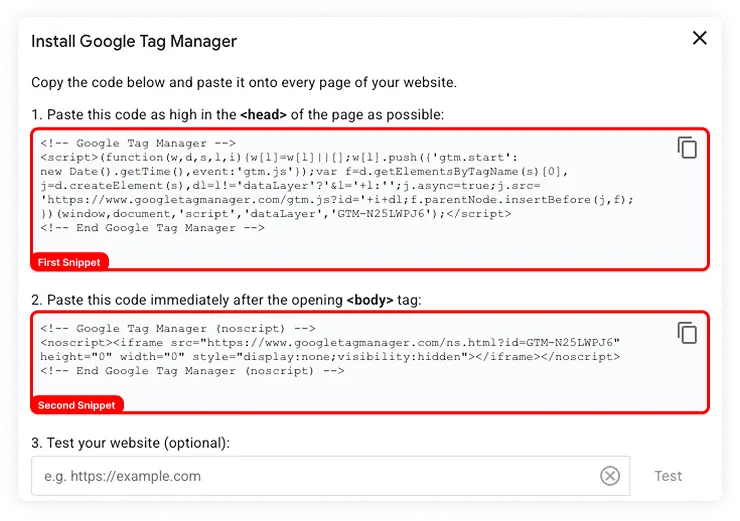
- Two code snippets will be created. These two codes need to be added to your website:
- First snippet: Must be pasted on the <Head> of your page.
- Second snippet: Must be pasted on the <body> of your page.
If you’re an existing account and already have the Snippets installed, jump to the next step.
Import Vally’s Container
To track bookings, we need to add events such as “add to cart”, “begin checkout” and “purchase” so that Google Analytics registers the key conversion actions. The Vally container file already includes these events, along with a GA4 Configuration Tag and a Cross-Domain Linker Tag.
How to do it:
- Go to tagmanager.google.com and sign in.
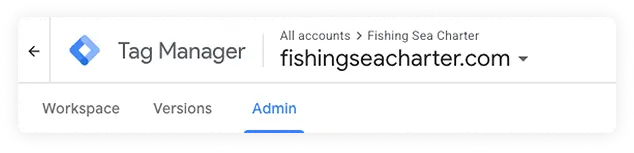
- In the top left menu, click Admin.
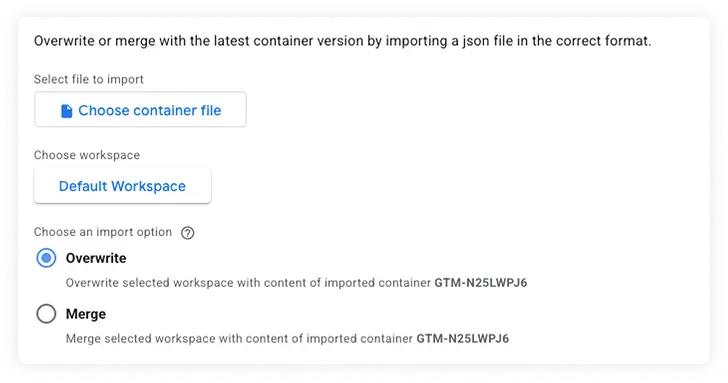
- Under the Container menu, click Import Container. A new window will show up:
- Download the file import file by clicking here: Vally Tag Manager Import File
- Click Choose container file and select the import file.
- On import options:
- If you’re a new acccount, select “Overwrite”.
- If you already have an existing acccount with tags created, select “Merge” instead.
- Wait for the import to complete, then close the window.
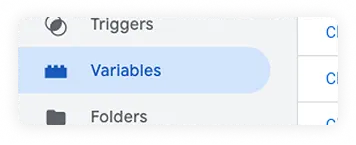
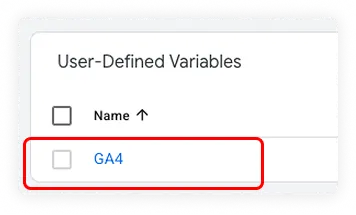
- In the left menu, click Variables.
- Scroll down to User-Defined Variables and click GA4.
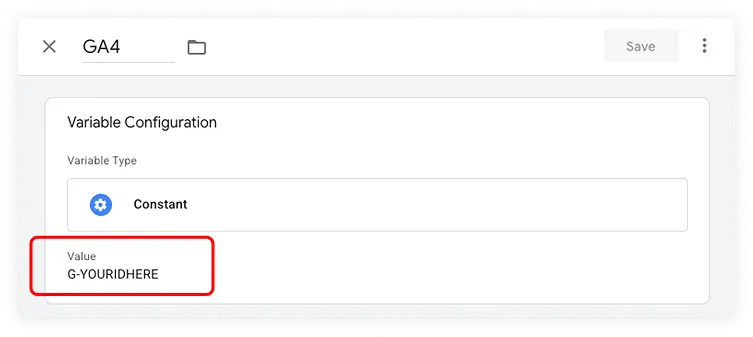
- Click on G-YOURIDHERE and replace it with your Measurement ID (G-XXXXXX).
- Click Save.
- Scroll down to User-Defined Variables and click GA4.
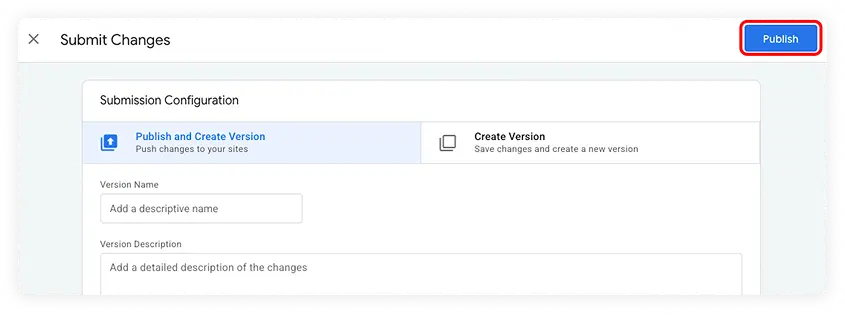
- Click Submit.
- Click Publish.
- Click Continue to finish.

Step 3) Add your GTM tag to your Vally’s business
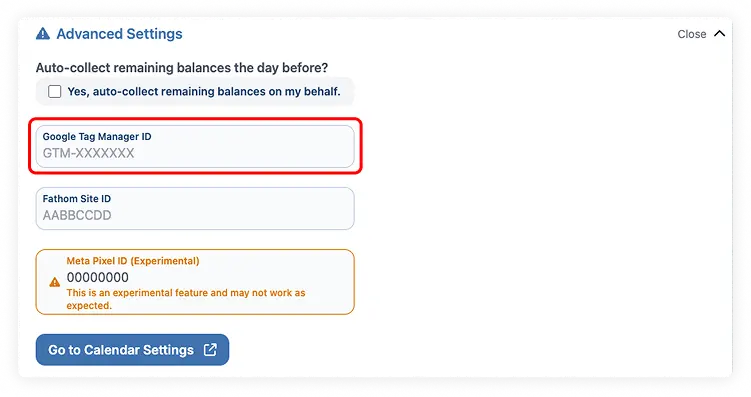
- Go to Google Tag Manager and copy your GTM tag.
- Log in to your account in Vally portal, and go to the Business Settings page.
- Scroll down to Advanced Settings and expand it.
- In Google Tag Manager ID, paste your GTM tag and click Update.
Step 4) Link your account to Google Ads
By linking Google Analytics 4 with Google Ads, you enable data sharing between the two platforms, allowing Analytics data to be used in Google Ads, and vice versa.
Note: Make sure you are signed in both your Google Analytics and Google Ads account.
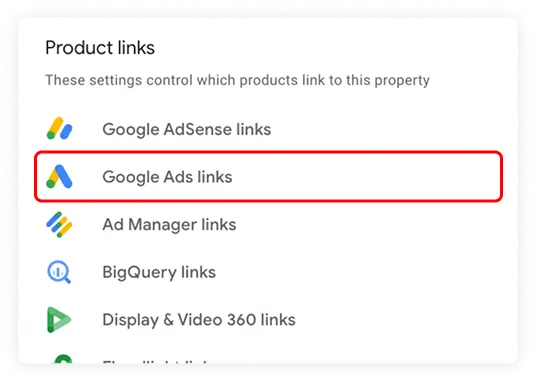
- Go to: Admin > Product Links > Google Ads Links.
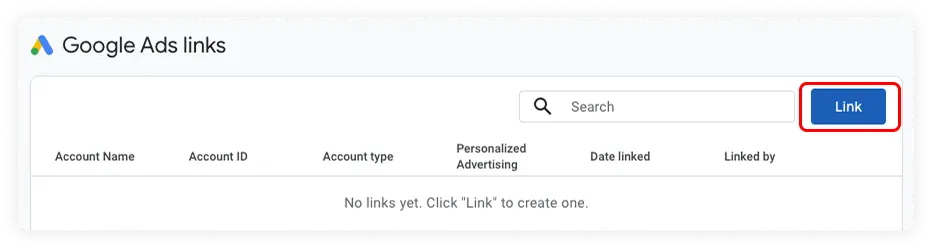
- Click Link.
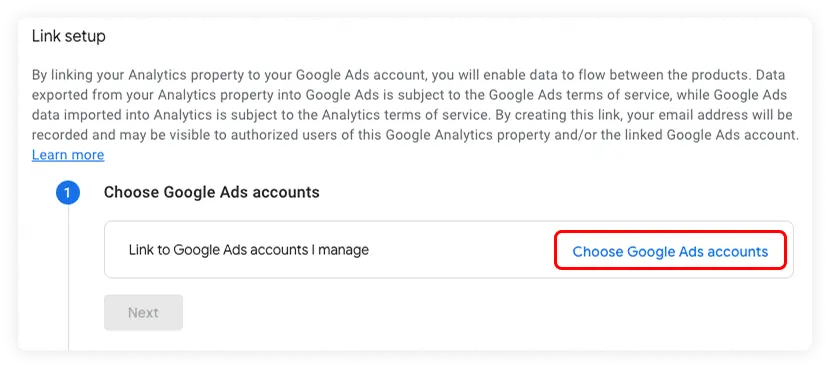
- Click Choose Google Ads Accounts.
- Select the desired account.
- Click Confirm.
- Click Link.
- Configure your settings:
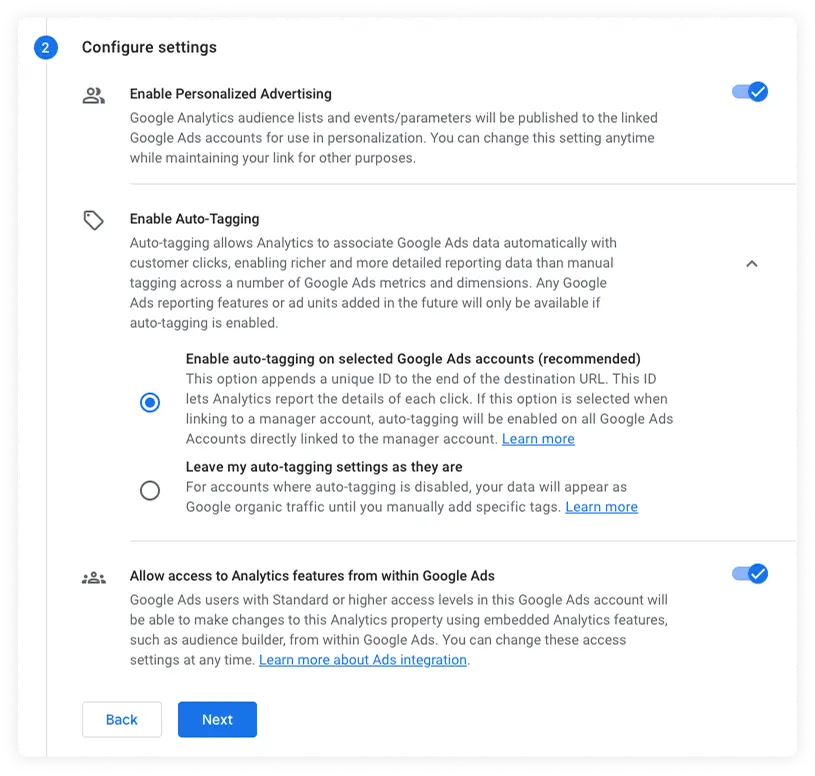
- Enable Personalized Advertising.
- Enable Auto-Tagging.
- Allow access to Analytics.
- Click Next.
- Review the settings and click Submit.
Your account will now be linked to your Google Ads.